Do It! 인터랙티브 웹 페이지 만들기 | Chapter06 정리
Chapter 06은 드디어 자바스크립트를 다룬다.
솔직히 css 너무 어려웠다 ㅠㅠ 물론 js도 너무 어렵다 ㅜㅜㅜㅜ
Javascript 란?
간단하게 설명하자면 웹페이지에 생동감을 넣어주기 위해 만들어진 언어이다.
다양한 이벤트 (ex. 마우스 클릭) 로 어떠한 동작을 하도록 할 수 있다.
html 파일에서 자바스크립트를 사용하는 방법은 크게 두 가지이다.
1. HTML 파일 내부에 자바스크립트 연결하기
<!DOCTYPE html>
<html lang="en">
<head>
    <meta charset="UTF-8">
    <meta name="viewport" content="width=device-width, initial-scale=1.0">
    <title>Document</title>
    <script type="text/javascript">
        console.log("Hello World!!!!!!!!!!!");
    </script>
</head>
<body>

</body>
</html>
이렇게 <head> 부분에 <script> 태그를 넣어서 태그 내부에서 작성할 수 있다.
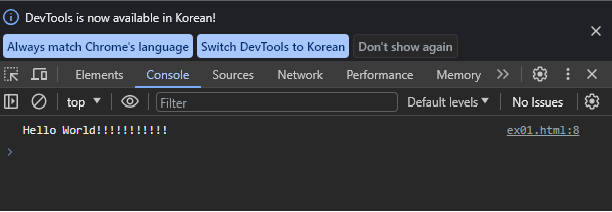
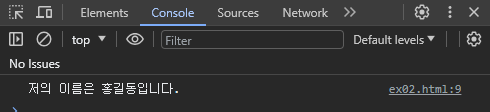
해당 페이지의 console 에 들어가보면 출력된 걸 확인할 수 있다.
2. HTML 파일과 외부 자바스크립트 연결하기
<!DOCTYPE html>
<html lang="en">
<head>
    <meta charset="UTF-8">
    <meta name="viewport" content="width=device-width, initial-scale=1.0">
    <title>Document</title>
    <script defer src="custom.js"></script>
</head>
<body>
</body>
</html>
위의 <script> 태그안에 경로 입력 전에 defer 를 입력한다 ( 이러면 웹 브라우저의 해석기가 <body>를 해석하면서
js파일을 가져온다.
console.log("HELLOOOOOOO WOOOOOOOORLD!!!!!!!!!!!!!!!!!!!!!!!!");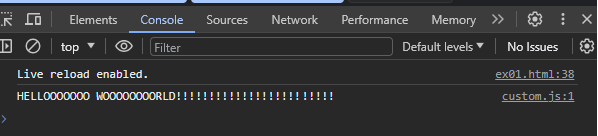
HTML 요소 선택하기
document.querySelector() - 요소 선택하기
[html]
<!DOCTYPE html>
<html lang="en">
<head>
    <meta charset="UTF-8">
    <meta name="viewport" content="width=device-width, initial-scale=1.0">
    <title>Document</title>
    <script defer src="custom.js"></script>
</head>
<body>
    <section id="wrap">
        <article class="box1">TEXT1</article>
        <article class="box2">TEXT2</article>
        <article class="box3">TEXT3</article>
    </section>
</body>
</html>
[javascript]
const frame = document.querySelector("#wrap");
console.log(frame);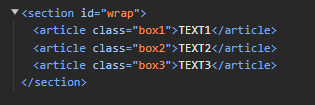
-> 아이디가 wrap이라는 요소를 찾아서 출력하는 코드
document.querySelectorAll() - 요소 모두 선택하기
const frame = document.querySelectorAll("#wrap article");
console.log(frame);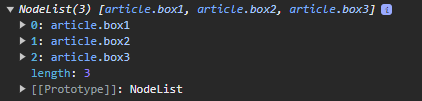
요소를 여러개 찾으면 NodeList라는 배열에 저장되어서 나온다.
만약 요소를 한개씩 출력하고 싶으면 배열을 for of 문을 활용해서 출력한다.
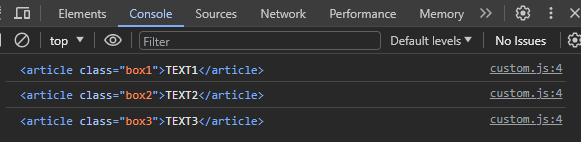
const items = document.querySelectorAll("#wrap article");

for(let item of items){
    console.log(item);
}
결과는 다음과 같이 나온다.
부모요소, 자식요소 선택하기
[html]
<body>
    <ul class="list">
        <li class="item1">item1</li>
        <li class="item2">item2</li>
        <li class="item3">item3</li>
        <li class="item4">item4</li>
    </ul>
</body>
[js]
const list = document.querySelector(".list");
const items = list.children;    // 자식 요소 선택

console.log(items);
console.log(items[0]);
console.log(items[1]);
console.log(items[2]);
console.log(items[3]);

const item = document.querySelector(".item2");
console.log('--------> 아래는 부모 요소')
console.log(item.parentElement);    /*부모 요소 선택 */
console.log('--------> 아래는 형제 요소')
console.log(item.previousElementSibling);    /*형제 요소 선택 */
console.log(item.nextElementSibling);    /*형제 요소 선택 */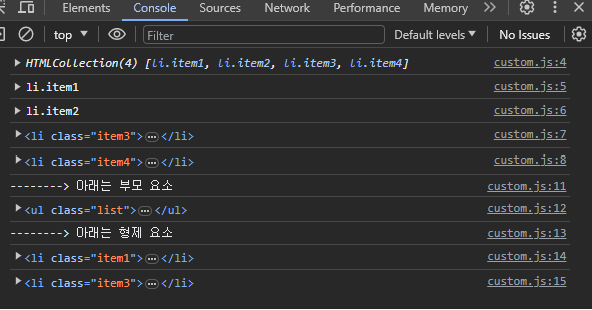
자바스크립트 이벤트
마우스 클릭 이벤트
html
<a href="https://www.naver.com">click</a>css
a {
    font-size: 100px;
    color: #555;
}
js
const link = document.querySelector("a");

link.addEventListener("click", (e)=>{
    e.preventDefault();
    console.log("링크를 클릭했습니다.");
});
호버 이벤트
마우스를 올리면 발생하는 이벤트이다.
mouseenter(), mouseleave()
html
<!DOCTYPE html>
<html lang="en">
<head>
    <meta charset="UTF-8">
    <meta name="viewport" content="width=device-width, initial-scale=1.0">
    <title>Document</title>
    <link rel="stylesheet" href="css/hover.css">
    <script defer src="js/hover.js"></script>
</head>
<body>
    <div id="box"></div>
</body>
</html>
css
#box {
    width: 200px;
    height: 200px;
    background-color: aqua;
    margin: 100px auto;
}
js
const box = document.querySelector("#box");

console.log(box);

box.addEventListener("mouseenter", ()=>{
    box.style.backgroundColor = "hotpink";
});

box.addEventListener("mouseleave",()=>{
    box.style.backgroundColor = "aqua";
});
See the Pen Untitled by yejin (@geniest) on CodePen.
비슷하게 img 태그에 onmouseover, onmouseout 속성을 적용하여 hover를 구현할 수 있다.
<!DOCTYPE html>
<html lang="en">
<head>
    <meta charset="UTF-8">
    <meta name="viewport" content="width=device-width, initial-scale=1.0">
    <title>Document</title>
    <script type="text/javascript">


        function changeImg(){
            var img = document.getElementById("poster");
            img.src = "../movie/movie_image2.jpg";
        }

        function changeImg2(){
            var img = document.getElementById("poster");
            img.src = "../movie/movie_image1.jpg";
        }
    </script>
</head>
<body>
    <img src="../movie/movie_image1.jpg" alt="" id="poster" onmouseover="changeImg()" onmouseout="changeImg2()">
</body>
</html>
같은 요소에 이벤트 한꺼번에 연결하기
html
<!DOCTYPE html>
<html lang="en">
<head>
    <meta charset="UTF-8">
    <meta name="viewport" content="width=device-width, initial-scale=1.0">
    <title>Document</title>
    <script defer src="custom.js"></script>
</head>
<body>
    <ul class="list">
        <li class="item1">item1</li>
        <li class="item2">item2</li>
        <li class="item3">item3</li>
        <li class="item4">item4</li>
    </ul>
</body>
</html>
js
const list = document.querySelectorAll(".list li");

for(let el of list){
    el.addEventListener("click", e=>{
        e.preventDefault();
        console.log(e.currentTarget.innerText);
    })
}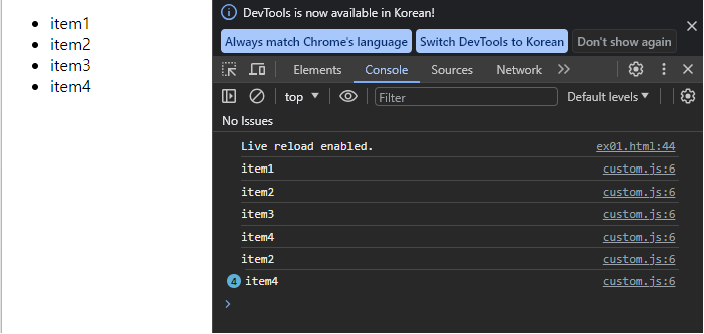
이렇게 리스트의 아이템을 클릭하면 해당 요소가 출력된다.
문자 안에 변수 삽입
여기서 주의할 점은 ' ' 작은 따옴표가 아니라 ` ` 백틱 기호를 써야한다.
JS 예제 )
See the Pen Untitled by yejin (@geniest) on CodePen.
자바스크립트로 클래스 제어하기
책보고 예제 따라함
See the Pen class by yejin (@geniest) on CodePen.
근데 원리가 좀 헷갈린다... ㅠㅠ 좀 더 생각해봐야겠음