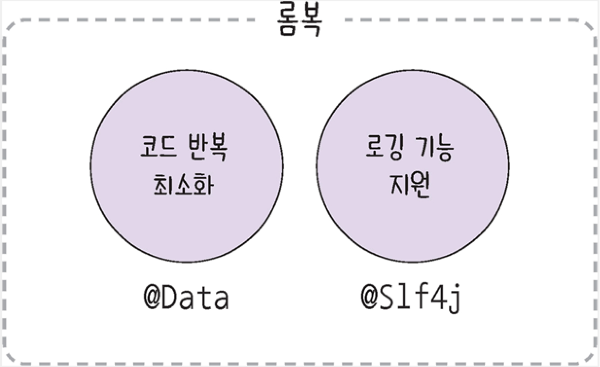
롬복이란?
코드를 간소화하게 해주는 라이브러리이다.
이전에 구현했던 코드를 롬복을 활용해서 리팩터링할 것이다.
build.gradle 파일의 dependenices { } 부분에 아래 코드를 추가해준다.
compileOnly 'org.projectlombok:lombok:1.18.0'
annotationProcessor 'org.projectlombok:lombok:1.18.0'

롬복이 설치된 것을 확인할 수 있다.
[ DTO 리팩터링 ]
앞서서 작성했던 ArticleForm.java 에서 생성자 코드와 toString() 메서드를 지우고 어노테이션으로 대체해줬다.
package com.example.firstproject.dto;

import com.example.firstproject.entity.Article;
import lombok.AllArgsConstructor;
import lombok.ToString;

@AllArgsConstructor         // 생성자 어노테이션
@ToString                   // toString() 메서드 효과 어노테이션
public class ArticleForm {
    private String title;   // 제목을 받을 필드
    private String content; // 내용을 받을 필드

    public Article toEntity() {
        return new Article(null, title, content);       // 생성자 입력 양식에 맞게 작성..
                                                            // ArticleForm 객체에 id 정보가 없기 때문에. id는 null 이 들어간다.
    }
}
-> 간소화된 것을 확인할 수 있다.
서버를 실행시키고 폼에 데이터를 입력하면 이렇게 롬복으로 바꾸어도 잘 출력되는 것을 확인할 수 있다.

[ 엔터티 리팩토링 ] 아까와 같은 방식으로 리팩토링 해줬다.
package com.example.firstproject.entity;

import jakarta.persistence.Column;
import jakarta.persistence.Entity;
import jakarta.persistence.GeneratedValue;
import jakarta.persistence.Id;
import lombok.AllArgsConstructor;
import lombok.ToString;

@AllArgsConstructor
@ToString
@Entity         // 엔터티 선언 ( 이 어노테이션이 붙은 클래스를 기반으로 DB에 테이블이 생성 )
public class Article {

    @Id     // 엔터티의 대표값 지정
    @GeneratedValue         // 대표값 자동생성 ( 시퀀스 키? 숫자 자동으로 매겨짐...)
    private Long id;
    @Column     // 필드 선언, DB 테이블의 title 열과 연결
    private String title;
    @Column     // 필드 선언, DB 테이블의 content 열과 연결
    private String content;

}
컨트롤러에 로그 남기기 [ ArticleController.java ]
println()문으로 데이터를 검증하면 기록에 남지 않고, 서버의 성능에도 악영향을 끼치기 때문에 절대 하면 안된다.
컨트롤러 클래스 위에 @Slf4j 어노테이션을 추가한다. ( 로깅 기능 )
@Slf4j => Simple Logging Facade for Java 의 약자이다.
package com.example.firstproject.controller;

import com.example.firstproject.dto.ArticleForm;
import com.example.firstproject.entity.Article;
import com.example.firstproject.repository.ArticleRepository;
import lombok.extern.slf4j.Slf4j;
import org.springframework.beans.factory.annotation.Autowired;
import org.springframework.stereotype.Controller;
import org.springframework.web.bind.annotation.GetMapping;
import org.springframework.web.bind.annotation.PostMapping;
/**
 * 폼 컨트롤러 !!
 *
 * action :  어디에 보낼지 정하는 것
 * method :  어떻게 보낼지 정하는 것 (get, post)
 *
 * **/
@Slf4j      // 로깅 기능을 위한 어노테이션 추가
@Controller
public class ArticleController {
    @Autowired      // 스프링 부트가 미리 생성해 놓은 리포지토리 객체 주입(Dependency Injection)
    private ArticleRepository articleRepository;    // articleRepository 객체 선언
    @GetMapping("/articles/new")
    public String newArticleForm() {
        return "articles/new";
    }

    @PostMapping("/articles/create")
    public String createArticle(ArticleForm form) {     // 폼 데이터를 DTO 로 받기
        log.info(form.toString());      // 로깅 코드 추가
//        System.out.println(form.toString());        // DTO 에 폼 데이터가 잘 담겼는지 확인

        //  1. DTO를 엔티티로 변환
        Article article = form.toEntity();
        log.info(article.toString());      // 로깅 코드 추가
//        System.out.println(article.toString());

        //  2. 리포지토리로 엔터티를 DB에 저장
        Article saved = articleRepository.save(article);    // article 엔터티를 저장해서 saved 객체에 반환
        log.info(saved.toString());      // 로깅 코드 추가
//        System.out.println(saved.toString());

        return "";
    }
}
다시 서버를 실행시키고, 폼에 데이터를 입력하면 아래와 같이 로그가 찍히는 것을 확인할 수 있다.

1분 퀴즈 )
• ( ㉠ ): 롬복을 설치하기 위해 값 변경이 필요한 파일
• ( ㉡ ): 모든 필드를 매개변수로 하는 생성자를 만드는 롬복 어노테이션
• ( ㉢ ): toString() 메서드를 대체하는 롬복 어노테이션
• ( ㉣ ): 로깅 기능을 사용하기 위해 필요한 롬복 어노테이션
• ( ㉤ ): 출력하기 원하는 데이터를 로그로 찍기 위해 사용하는 구문
[ 답 ]
ㄱ : build.gradle
ㄴ : @AllArgsConstructor
ㄷ : @ToString
ㄹ : @Slf4j
ㅁ : log.info()
셀프 체크 ) 3장 회원가입 코드 리팩토링하기.
=> 완료함.
게시글 읽기 : Read
데이터 조회 과정

[ ArticleController.java ]
@PathVariable 어노테이션은 URL 요청으로 들어온 전달값을 컨트롤러의 매개변수로 가져온다.
 @GetMapping("/articles/{id}")    // 데이터 조회 요청 접수
    public String show(@PathVariable Long id) {     // 매개변수로 id 받아오기
        log.info("id = " + id );        // id 로그 찍기
        //  1. id 조회해 데이터 가져오기
        //  2. 모델에 데이터 등록하기
        //  3. 뷰 페이지 반환하기

        return "";

    }
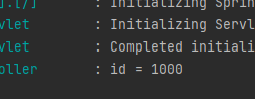
서버를 재시작하고
http://localhost:8080/articles/1000 를 주소창에 입력했을 때 콘솔에 아이디 로그가 잘 나오는 것을 확인 할 수 있다.
@GetMapping("/articles/{id}")    // 데이터 조회 요청 접수
    public String show(@PathVariable Long id, Model model) {     // 매개변수로 id 받아오기   + model 객체 받아오기
        log.info("id = " + id );        // id 로그 찍기
        //  1. id 조회해 데이터 가져오기
        Article articleEntity = articleRepository.findById(id).orElse(null);        //id 없으면 null 반환

        //  2. 모델에 데이터 등록하기
        model.addAttribute("article", articleEntity);

        //  3. 뷰 페이지 반환하기
        return "articles/show";     // show 파일 반환.

    }
Entity에 기본 생성자 추가해주기
[ Article.java ]
@NoArgsConstructor // 기본 생성자 추가 어노테이션기본 생성자를 추가해주는 어노테이션을 작성해준다.
그 다음으로 뷰를 생성
[ show.mustache ]
{{>layouts/header}}
<table class="table">
    <thead>
    <tr>
        <th scope="col">ID</th>
        <th scope="col">Title</th>
        <th scope="col">Content</th>
    </tr>
    </thead>
    <tbody>
    {{#article}}
    <tr>
        <th>{{id}}</th>
        <td>{{title}}</td>
        <td>{{content}}</td>
    </tr>
    {{/article}}article}}
    </tbody>
</table>
{{> layouts/footer}}
서버를 재시작하고 데이터를 입력한 다음 http://localhost:8080/articles/1 에 들어가면 이렇게 입력한 데이터를 확인 할 수 있다.
1분 퀴즈 )
• ( ㉠ )(이)란 URL 요청으로 들어온 전달값을 컨트롤러의 매개변수로 가져오는 어노테이션입니다.
• ( ㉡ )(이)란 JPA의 CrudRepository가 제공하는 메서드로, 특정 엔티티의 id 값을 기준으로 데이터를 찾아 Optional 타입으로 반환합니다.
[ 정답 ]
ㄱ : @PathVariable
ㄴ : findById()
데이터 목록 조회
좀 전에는 단일 데이터를 조회했다면, 이번에는 목록으로 조회해보겠다.
아까처럼 컨트롤러에 메서드를 추가.
참고로
findAll()메서드의 반환값은 기본적으로 <Article>의 Iterable 타입으로 반환한다.
그래서 ArticleRepository에서 CrudRepository의 메서드를 오버라이딩 해주겠다.
public interface ArticleRepository extends CrudRepository<Article, Long> {
    @Override
    ArrayList<Article> findAll();        // Iterable -> ArrayList로 수정 ( findAll()메서드의 반환값은 기본적으로 <Article>의 Iterable 타입으로 반환하기 때문)
}
[ ArticleController.java ]
@GetMapping("/articles")
    public String index(Model model) {

        // 1. 모든 데이터 가져오기
        ArrayList<Article> articleEntityList = articleRepository.findAll();
        // 2. 모델에 데이터 등록
        model.addAttribute("articleList", articleEntityList);

        // 3. 뷰 페이지 설정
        return "articles/index";
    }
[ index.mustache]
{{>layouts/header}}
<table class="table">
    <thead>
    <tr>
        <th scope="col">ID</th>
        <th scope="col">Title</th>
        <th scope="col">Content</th>
    </tr>
    </thead>
    <tbody>
    {{#articleList}}
        <tr>
            <th>{{id}}</th>
            <td>{{title}}</td>
            <td>{{content}}</td>
        </tr>
    {{/articleList}}
    </tbody>
</table>
{{> layouts/footer}}
이렇게 뷰가 완성되었으니 다시 서버를 실행하고 데이터를 입력하면 리스트가 뜰 것이다.
-> localhost:8080/articles에 다시 접속
1분 퀴즈 )
• ( ㉠ )(이)란 JPA의 CrudRepository가 제공하는 메서드로, 특정 엔티티를 모두 가져와 Iterable 타입으로 반환합니다.
ㄱ : findAll()
'스터디 > back' 카테고리의 다른 글
| 12장 ~ 14장 (0) | 2023.12.21 |
|---|---|
| Part 3) REST API와 JSON | HTTP와 REST 컨트롤러 (0) | 2023.12.14 |
| Part 2) 게시판 만들기 (3) - 리다이렉트 / update / delete / SQL 쿼리 (1) | 2023.12.07 |
| Part 2) 게시판 만들기(1) (0) | 2023.11.21 |
| Part1 ) 스프링 부트 개요 (0) | 2023.11.15 |